

Approximately 35 million PowerPoint presentations are given worldwide every day. People use PowerPoint screen recording for different purposes. PowerPoint makes it easier for a person to communicate with a larger group of people in a compact yet detailed way. It not only makes a presentation eye-catching but also helps in explaining things better.
Whether you are a student or a teacher, a business person, or work in a corporate firm, PowerPoint presentations will always be relevant. Depending upon your requirement, you can make presentations for business or sale purposes as well as product demos. You can also make PowerPoint slides for training and tutorials, executive communications, educational lectures, and assignments.
PowerPoint presentations have been a major part of our lives for quite some time. However, since the COVID pandemic has hit us, the world has gone virtual, and our needs have evolved. We now not only need to make presentations but also to record them.
So, in this article, we will discuss the best way to record a PowerPoint presentation.
Different Methods to Record PowerPoint Presentation
Sometimes, you may need to record a presentation that you are giving live or maybe you may need to record a presentation beforehand. There are multiple ways to record your PowerPoint presentations depending on your requirement. Here we will list two ways:
Screen Recording in PowerPoint:
PowerPoint also has a built-in screen recording feature, where you can record audio as well as your screen. This way you can switch between different applications and communicate more efficiently. For example, if you are a teacher and you want to show the students a video on YouTube, it can be recorded with the help of this feature and then added to the slide of your choice.
Third-Party Apps:
Another way of recording your presentation is by using third-party apps such as QuickTime Player, Flashback, Camtasia, Wondershare DemoCreator, etc. This software allows you to record your screen as well as your video via webcam.
The best way to record a PowerPoint presentation is by using third-party apps. Now we shall look into one of the best third-party apps out there that is Wondershare DemoCreator.
How to Record and edit PowerPoint Presentation Video Using Wondershare DemoCreator?
Wondershare DemoCreator is a great app for video editing and screen recording. It is one of the most advanced and free video editors available nowadays. With this software, it is extremely easy to record yourself and your PowerPoint slides side-by-side with just your laptop and its built-in webcam and microphone.
We shall now look into the ins and outs of recording a PowerPoint presentation using the computer screen recorder. Follow these steps to start recording.
Step 1: Download the software from the official website. You can buy the paid version or simply download the free version to get started.
Step 2: Open your PowerPoint presentation.
Step 3: Launch the Wondershare DemoCreator.
Step 4: A dialog box will open. Click on “New Recording.”


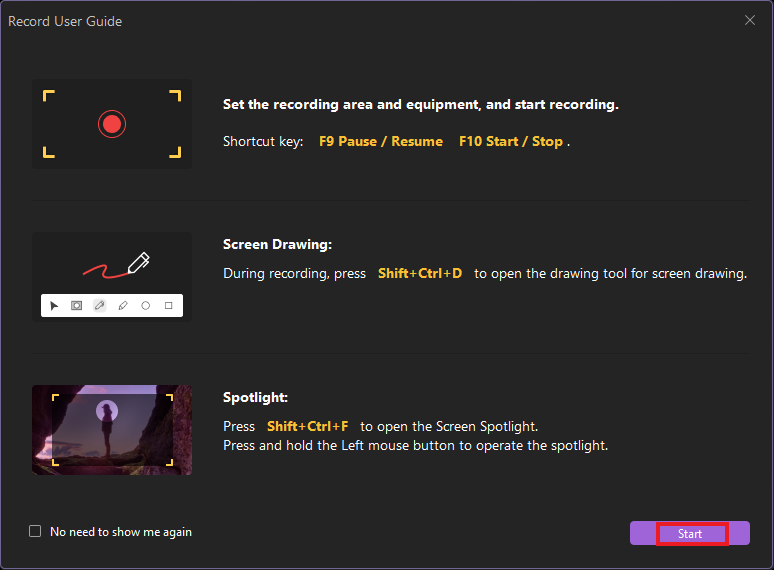
A “Record User Guide” will open. Click on “Start” to move to the next step.

Step 5: DemoCreator will automatically detect any connected audio and video feeds, whether you’re using your computer’s built-in devices or an external webcam or microphone that you’ve plugged into your USB ports.


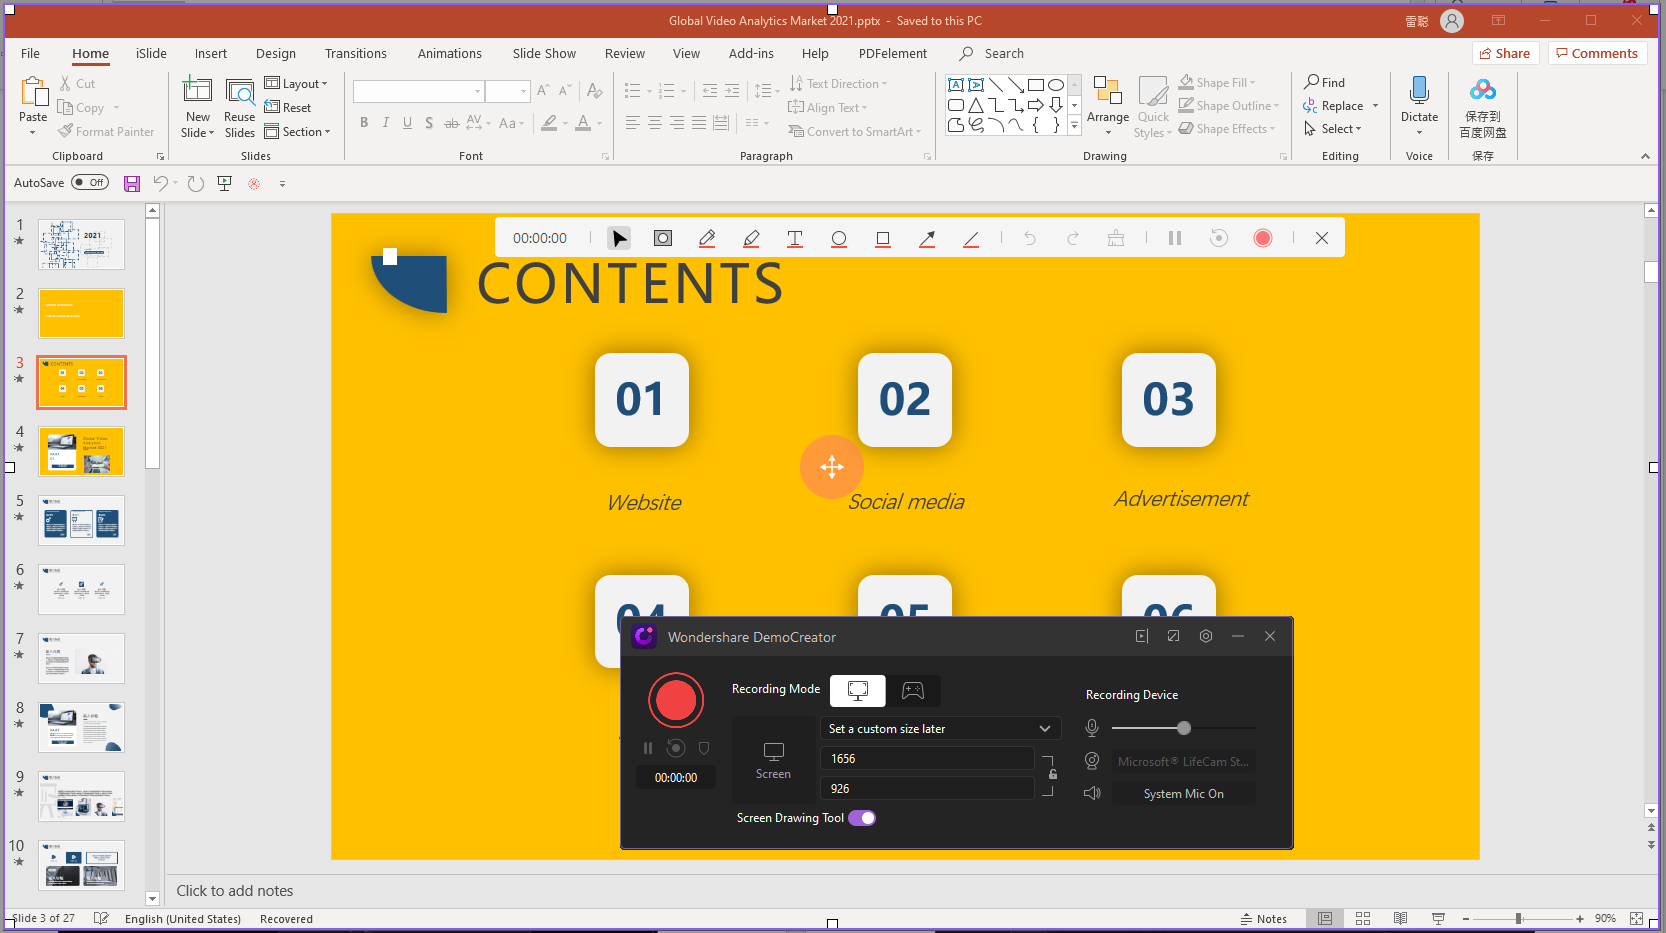
With DemoCreator, you will have two options for recording your slides. You can either record your slides by recording your screen or select the recording region. If you choose “Select a target window later”, then DemoCreator will detect the application on your screen. For example, if you open and click your PowerPoint, DemoCreator will detect the region of the enter frame. You will not have to drag to the entire region.
Step 6: Set up your presentation and press the record button. Minimize the dialog box so that it does not cover any part of your screen.

Step 7: Once you are done recording your presentation, press F10 to stop the recording. You can also stop the recording by opening the dialog box and clicking on the record button.
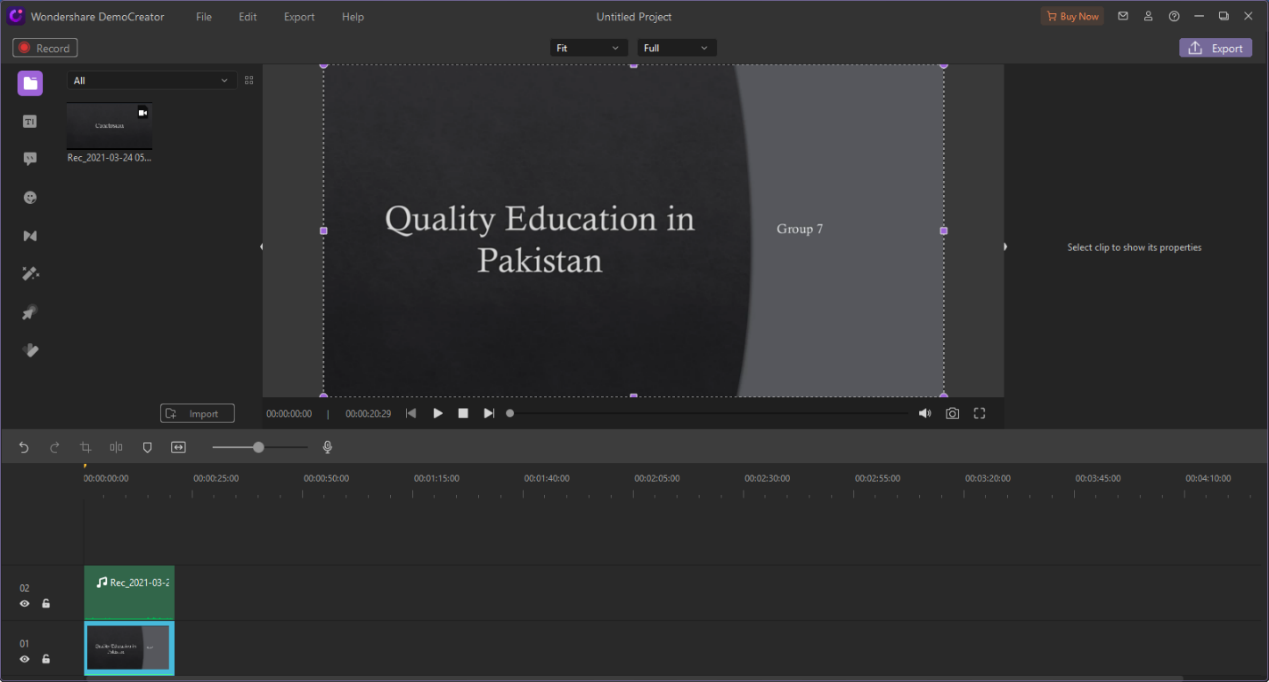
Step 8: Your recording will be saved in the DemoCreator library. You can now edit the recording as you wish. For editing, DemoCreator allows you to add text, annotations, stickers, effects, transitions, and much more. You can also split or crop the recording and edit the audio as well.

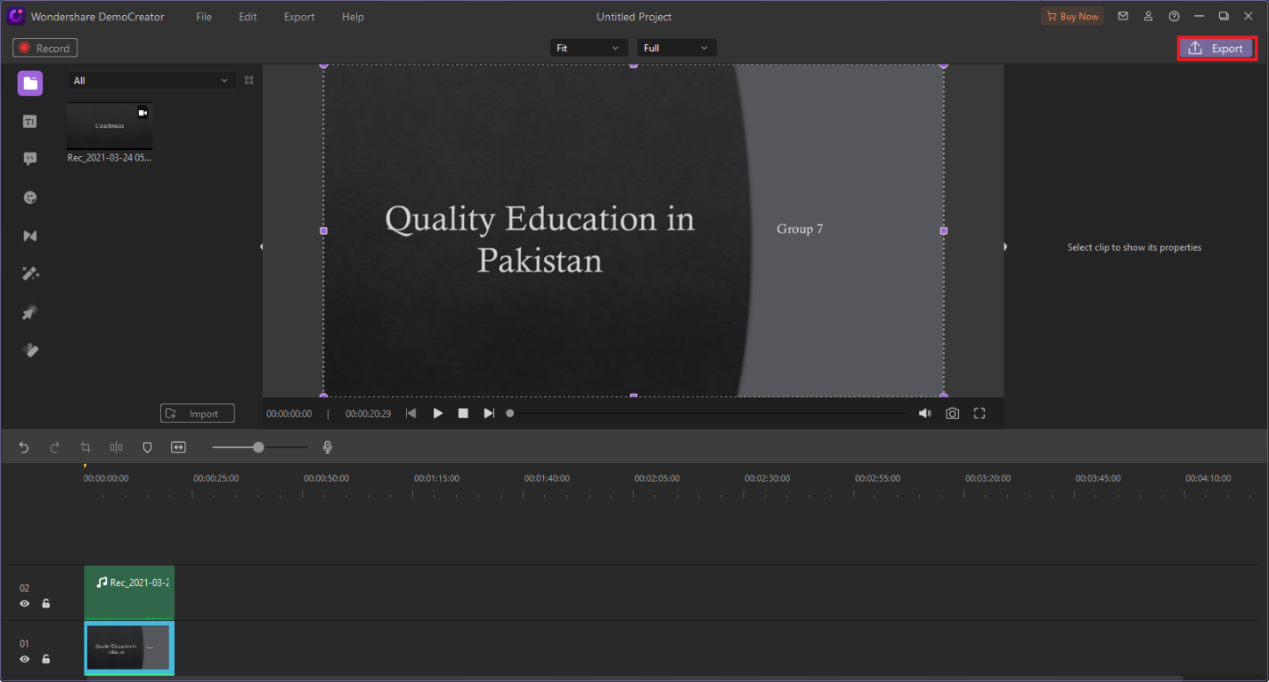
Step 9: Once you have made all the necessary changes, click on “Export” in the top right corner to save the recording.
Step 10: Give your file a suitable name and choose the required format. You can export the file to your PC or directly upload it to your YouTube channel.
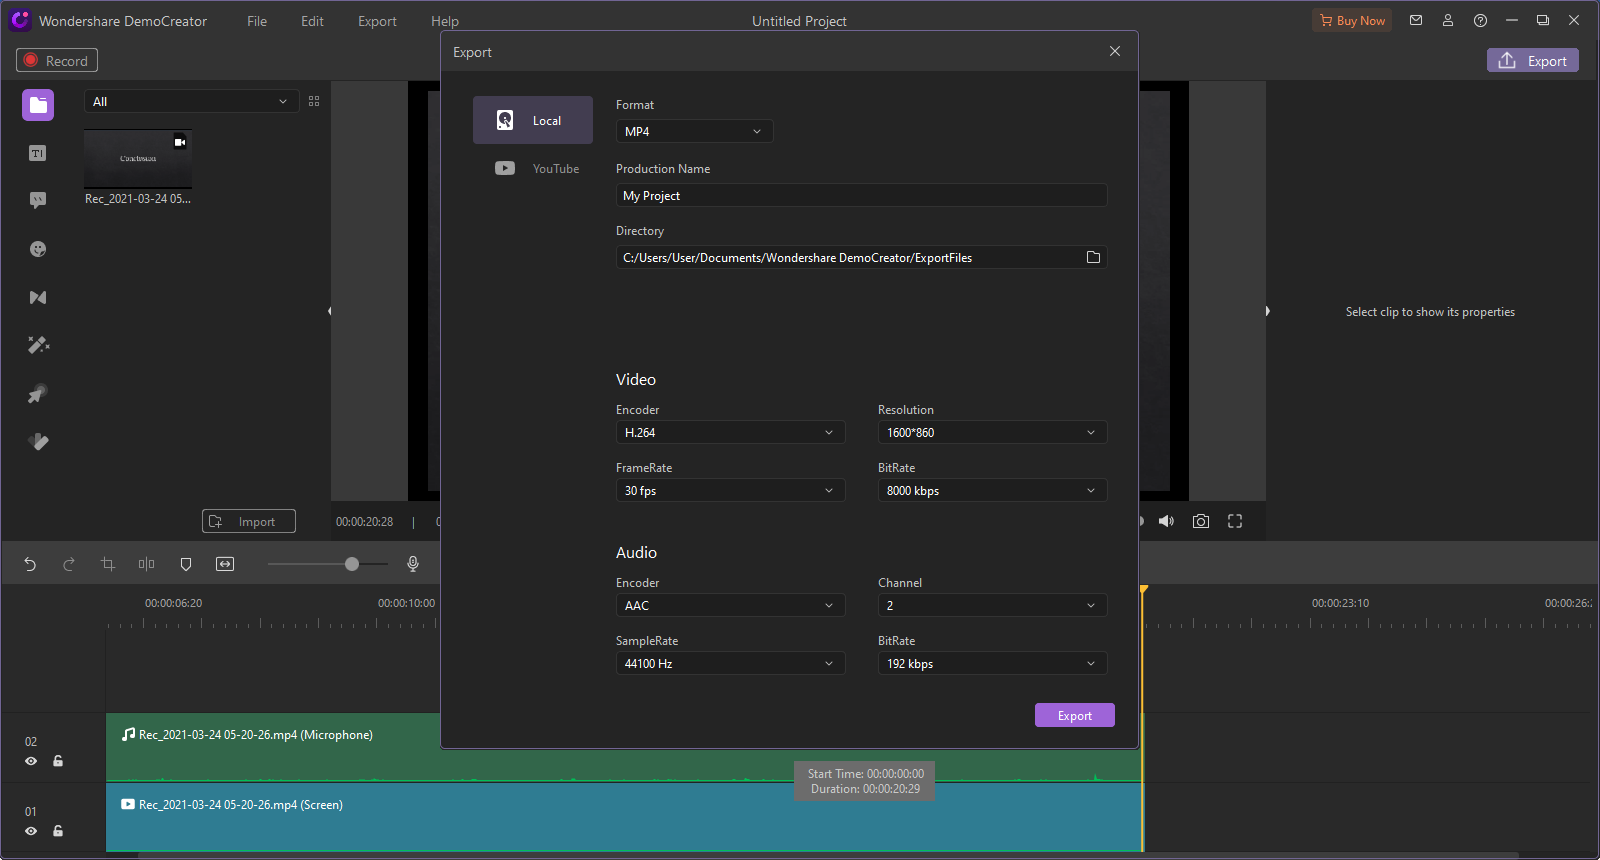

After the appropriate settings have been made, click on “Export” to export it to the set location.
Step 11: Click on “Done” once the file has been exported.
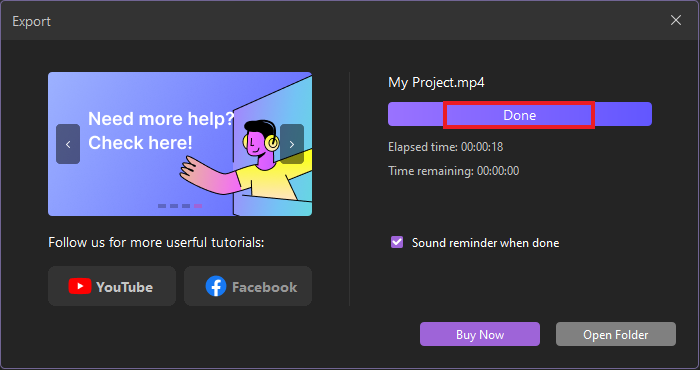

Your PowerPoint presentation has been recorded successfully! Now, all you have to do is share it with whoever you like.
Conclusion
Today, many presentations are given remotely via video conferencing applications, like Zoom or WebEx Meetings. You can use DemoCreator even to record and share a live presentation that you are giving at a video conference.
PowerPoint presentations have been making our lives easier for quite some time but now a new lifesaver that is DemoCreator has made it much easier for us to evolve with the changing time!
Also Read: 10 Premium PowerPoint Presentation Templates