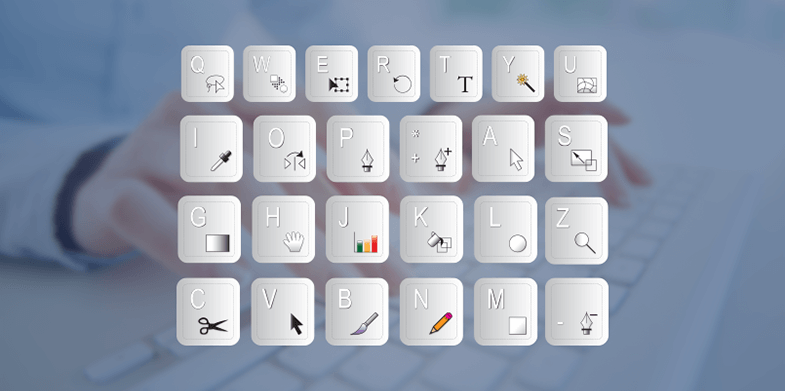
If you are a designer, you must pay attention to detail, which makes doing a great job time consuming. You can accomplish much more in a shorter period of time if you have design shortcuts at your fingertips. Designing is not easy, and as what you are working on increases in complexity, anything that will help make the working process easier should be explored. That is why you need to have a list of shortcuts for quick reference to make things better for you. If you are starting out with web design, shortcuts will help you feel like a pro! Here are some of the shortcuts that you should try out:
1. Isolating Layers
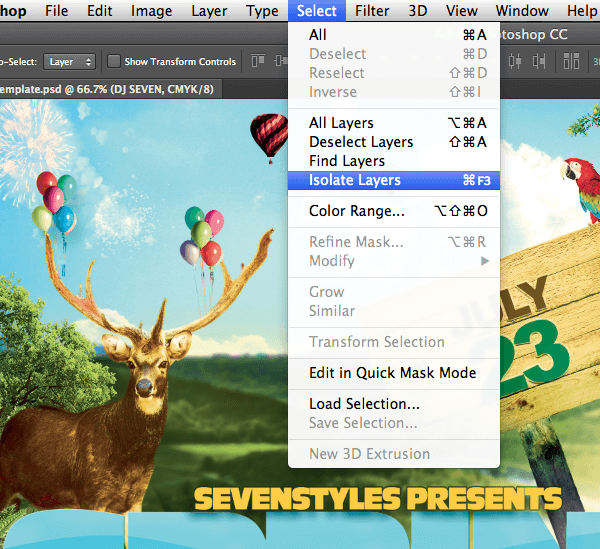
When you are constantly reaching for the eye icons on your layer panel, you spend a considerable amount of time making slight alterations, which could lead to interrupted flow of creativity. This is one of the best shortcuts for a designer that wants to save time. With this shortcut, it is possible to turn on and off the visibility of the layer or layers that you have selected. You can then choose to just select the layer or layers of your interest in the midst of your design process.
2. Rotate Canvas

Designers who use graphic tablets will find this shortcut quite useful. What you need to do is to hit the R key for two seconds, then left click and drag the document in order to rotate it on the canvas as much as you want without rotating the main document. There is a compass tool to help direct you with the rotation, making it easier for you to amend your design at an odd angle.
3. Selection Operations

Design work is serious, but it should also be fun and this shortcut makes it easier for any web designer to enjoy the process. If you want to add to a selection, you can always use the shift key. If you want to remove from the selection on the other hand, you just need to hold down the Alt key. You can also use the Shift+Alt keys at the same time in order to link the selections. This makes it possible to do speedy alterations, as the alternative to this would be constantly clicking on the icons at the top of the page.
Also Check: Some amazing time-saving tricks and shortcuts in Photoshop
4. Deselecting All the Layers

Once you have made corrections to your document and it is close to perfect, you can prevent making further mistakes by ensuring that you deselect layers. The design shortcut for this is Command/Ctrl + Shift + A.
5. Smart Objects Conversions
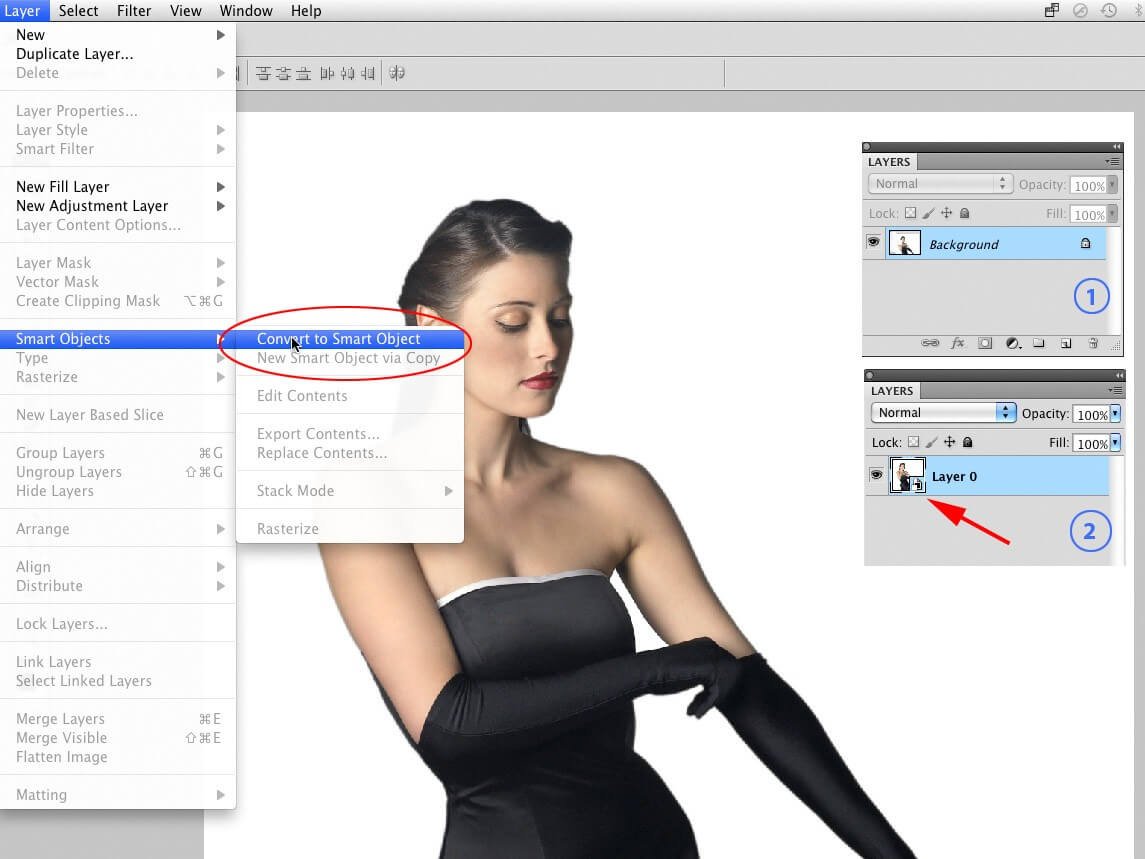
If you want to work on Photoshop with minimal or no distractions at all, you will need smart objects. However, there is no default design shortcut for this, so you need to create one. You create your ideal shortcut by choosing the Command/Ctrl Symbol, then Shift and O for opening the object, and simple substitute the O with an E for editing the smart object.
6. Quickly Open Documents

If you have no document on your canvas, you just double click on the empty area and the open window appears. This way, you can quickly select the document that you want to work on.
7. Paragraph Conversion
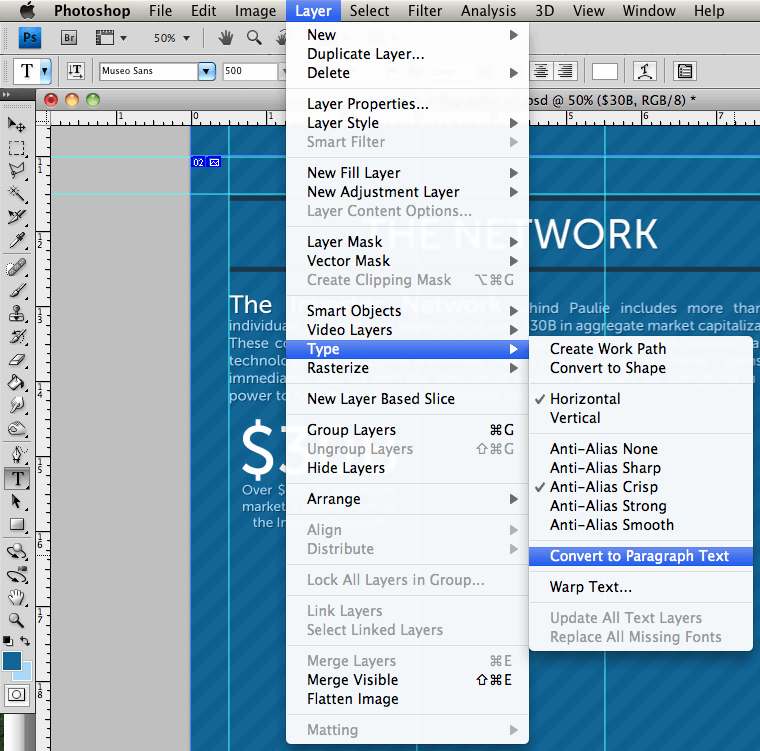
Creating separate type layers in Photoshop that are easy to edit can be done in two ways. One is by clicking with your type tool on any part of the page so that you can develop a point type layer. This will not break the lines of your texts automatically as it is required. To combat this, you need to develop a paragraph type later which can be down by clicking and dragging the type tool to outline the paragraph area. The shortcut that you should use is Command/Ctrl + Shift + P. This will convert the paragraph in record time.
8. Quickly Change Opacity
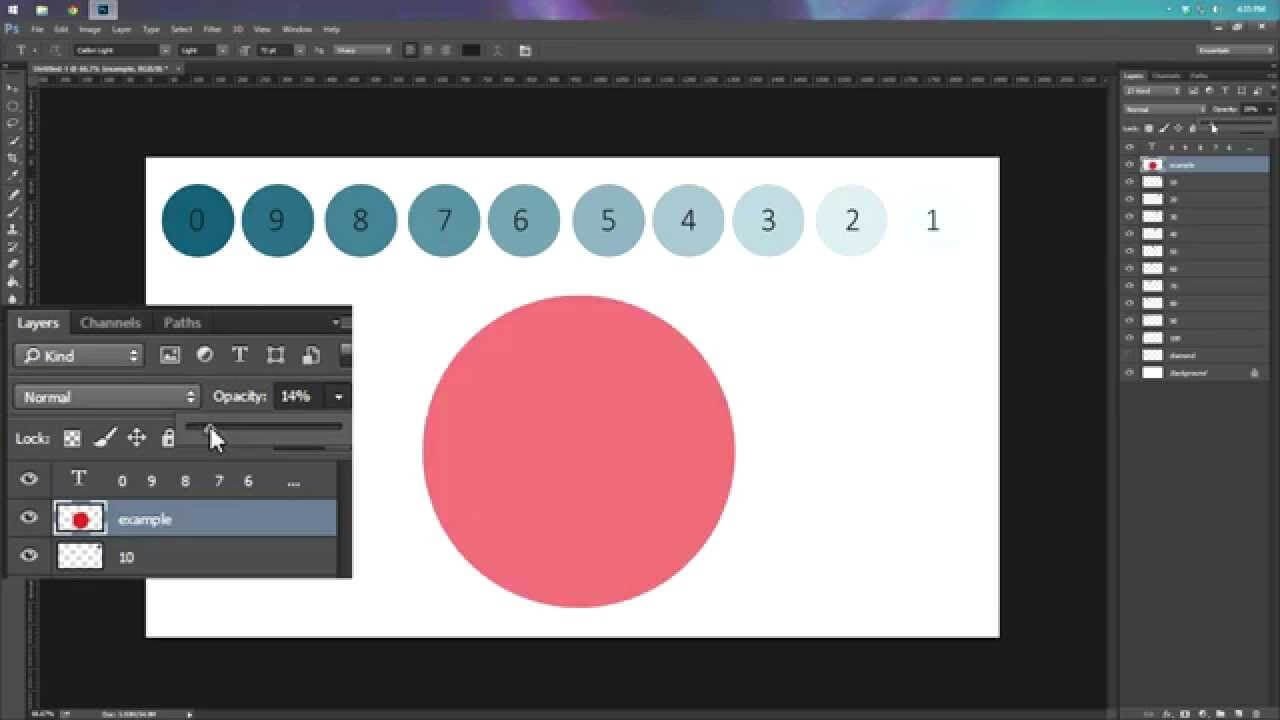
This is a shortcut that will save you so much time and make altering color much easier for you when you are designing. To achieve this, you only press the numbers on your keyboard so as to set the opacity of the drawing tool that you are using. You can do this by increments of 10. If you want to set it in percentage form, you can for instance hit 6 for 60%. You can also quickly type in the percentage, for instance a 38%. When using the Move tool, you can use this short cut in order to set the opacity of your current layer; just hit the number keys and it will be done.
9. Use of the Mixer Brush Tool
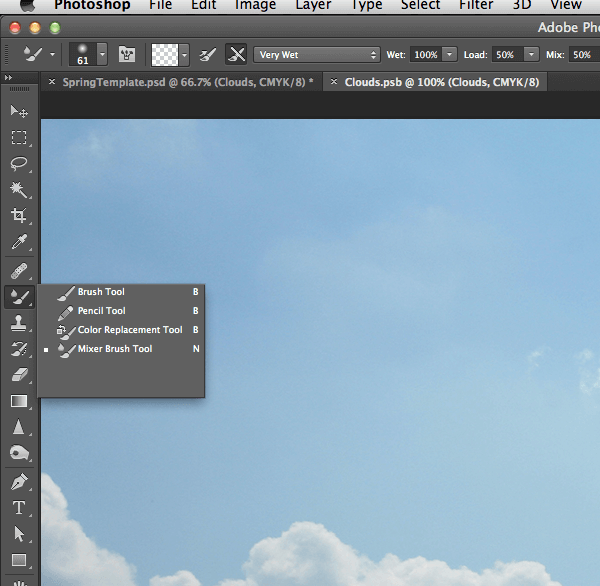
The mixer brush is used together with the brush tool and the brush tool is set by default B. A good shortcut that can benefit so many designers is to set the mixer brush as N, which is the letter that is just next to B on the QWERTY keyboard. This makes working with these tools together much easier. N has been already assigned to a 3D tool that is used on rare occasions, that is why it will work perfectly for the mixer brush, which is used all the time.
10. Create your own shortcuts

The more you explore web design, the easier it will be to identify where your strengths and weaknesses lie. If there are no shortcuts available that meet your specific requirements, take some time to create your own. You could choose to reassign existing shortcut or even reset the those that are on your keyboard. While you are working on your keyboard shortcuts, you will find that you can also develop shortcuts for your mouse.
There are so many design shortcuts that designers need to know in order to work better and faster and to ensure that they do not interrupt their creative process. Take some time to learn the shortcuts that have been mentioned in this article. They are sure to take your designing to a much higher level.
Thanks For Share This Blog, Too Informative For ME !!!!!